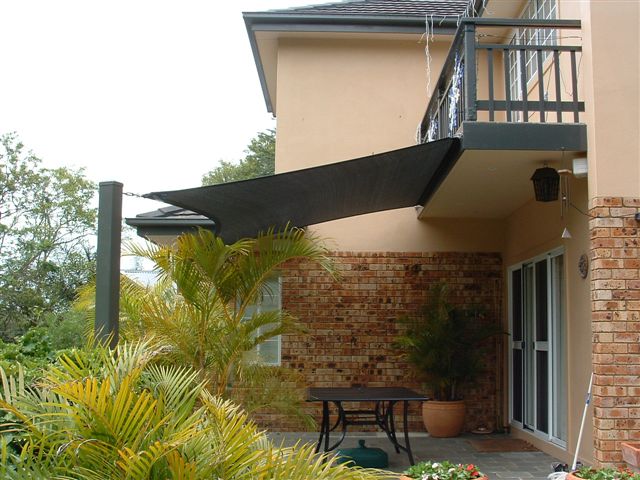
Looking to make your own deck shade sails? When you own a deck it’s a great place to entertain but any sun you get on the deck can get quite hot, which makes it too uncomfortable to entertain. A good deck shade sail can keep your deck quite cool and give you a comfortable place to sit and have fun with friends.
These shades can be quite expensive to buy but thankfully there are ways you can make them on your own. If you are looking to make your own deck shade sails I recommended the DIY (Do It Yourself) Shade Sail book. In this book, you’ll learn the techniques required to make your own deck shade sail from an expert.
For over a decade the writer of the book has been manufacturing, designing and installing high quality sail style cloths for decks to keep the sun off. His techniques are combined in an easy to follow book that anyone can use to make their own professional looking shade sail. You can have the covering you have always wanted for your deck that looks great and makes it much cooler for those hot days when you wan to stay on your deck and entertain your friends.
Shade Sails Step By Step
The book contains step by step instructions so you can make your very own shade sail and save hundreds of dollars. The handbook is done in a way that anyone will be able to use it, regardless of their experience.
What You’ll Learn
Introduction
In the beginning you’ll learn all about shade sails and how they protect you from UV radiations form the sun. You’ll get facts and why you should install a shade sail.
Planning
In the next section you’ll learn how to plan for your shade sail. You find out of you need permission for your plan, how to dig the holes, install your columns plus a lot more.
Design
The next section will describe shade sail design. You’ll learn how to order a shade sail and more.
Putting it Together
You’ll learn how to put the poles in the holes and more about the structural design details. You’ll learn about the hardware you need for your shade sail and how to fit the shade sail so it’s installed in the correct manner. You’ll get a step by step guide for the installation process.
The book covers everything that you’re going to need to install and use your own shade sail at home. These shade sails are great for protecting you and your family from harmful UV rays and for making your deck or other outside area a comfortable place to be.
People who have read the book say it has helped them install their own shade sail at home. The book also shows you how to install the shade sail so you get the s shade where you want it the most. The book shows you how to plan where the shade sail will go too. DIY (Do It Yourself) Shade Sail book is recommended.
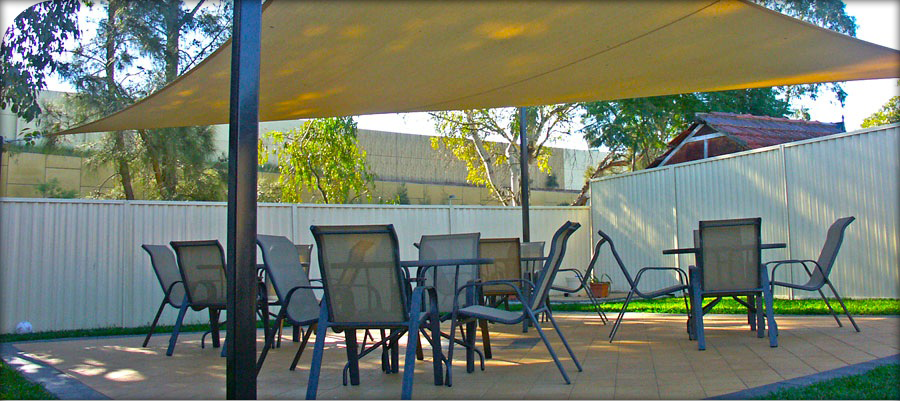
Looking for information on shade sails DIY or shade sails do it yourself? A good shade sail can make a great addition to your outdoor deck or other area where you entertain. You can buy these yourself if you want to or you can do this project on your own. Here’s a few things you need to know about shade sails.
A shade sail will provide you with ample shade for your outdoor are. This will keep it cooler but also allow you a lot of protection form the sun’s harmful UV rays. You will have to decide where you want be shade sail be so it to maximizes the potential of the sail to provide you with the best protection from the sun. It can be difficult to understand exactly where to put your sun shade or even how to start the process. There’s a book called DIY Shade that will help you understand shade sails.
How Can DIY Shade Help Me?
These shade sails are one of the best way to provide you with a good amount of shade and UV protection when you are outside entertaining or just want to enjoy a meal outside without having to worry about the heat. The book is a step by step guide that will teach you everything you need to know about shade sails and how to install one outside. You’ll learn all the basics and get helpful tips form an expert that has been working with shade sails for as number of years and has even designed these shade sails. The book explains things so well that you’ll be shade sail expert by the time you’re done.
Benefits of this Book
If you have wanted to install a shade sail this book takes you through step by step using a simple process you can understand.
If you want a cool area outside for entertaining then this book is for you. Installing the shade sail won’t cost you a lot of money.
If you want a nice looking shade that people will talk about then this book is for you.
If you talked to a professional company you know how much shade sails can cost. By installing it yourself you’ll save a ton of money and have a great shade sail once you’re done.
Learn about Shade Sails Now
This book is a comprehensive guide to learn everything about shade sails. This is your installation bible and you’re going to have a great shade sail in your yard once you have read this book. There’s a lot of helpful charts in this book that break down the installation process so you don’t make mistakes during the installation procedure. This book is low cost but provides you with a ton of information about shade sails. This is the only guide you’ll ever need to having a great shade sail in your backyard. If you have always wanted a shade sail then the Shade sails DIY book is the right choice for you.
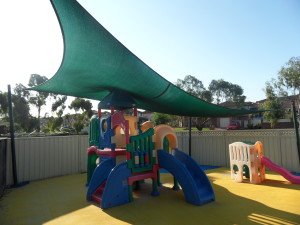
Have a look at this shade sail. It’s a problem that we see often. The shadesail is sagging badly in the centre and this particular sail has gotten to the point that it has sagged so badly that the centre is rubbing on the top of the play equipment and this has caused it to wear a hole in middle.
The cause of the problem is simple – the solution is more difficult.
The reason this shade sail is sagging is because the posts which support it have been underspecified – that is, they are much to light to support a sail of this size. To make matters even worse, at least one of the posts has actually moved. The cause of a post moving in the ground is that it wasn’t put in deep enough. Over time, with the wind and tensions on the sail, the footing of the pole has moved in the ground causing the post to slope inwards and the sail to sag.
We were contacted by the proprietor of this childcare centre wanting us to manufacture him a new sail – not a problem! The issues however come into play when it comes time to tension the new shade sail.
It is possible to “beef-up” the undersized footing on the post that has moved but it isn’t so easy to stiffen up the columns to support a new shadesail. Basically, as soon as we go to apply any real tension on the new shadesail, the columns, because they are much to light to support a sail of this size will begin to flex inwards. The more we tighten the sail, the more the columns will bend making it nearly impossible to get the sail tight.
This is a problem that should not have happened and could have easily been avoided. It is so important to use the correct size posts and footings when installing a shadesail. It may have seemed like an easy option at the time to use cheaper posts and it was probably a hot day when the installers dug the holes for the posts and they thought, “ahhh, this should be deep enough, who will ever know”. Well now the whole thing has come back to bite.
I can’t emphasis it enough to you the DIY shade sail installer – Do not short cut on the size and specification of your columns. Do not think near enough is good enough when it comes to digging a decent footing. If you do, you’ll most likely end up with something like this and there’s nothing worse than a sagging shade sail!
Probably the most common design for shade sails in the industry is the standard “Hypar” Design. Hypar is short for hyperbolic parabola. This basically means twisting the sail to create a 3D effect. Typically when people look at a hypar shadesail for the first time they often mistakenly think that it is two triangles when in fact it is a single piece of fabric tensioned in such a way as to create this interesting architectural effect.
The hypar effect is created simply by installing diagonally opposed high and low attachment points. This then creates the 3D twist effect in the sail.
Installing a hypar design shadesail starts by working out the two low points. Usually the low points of the sail are 2.2 metres above ground. Where ever possible look to install at least one of the low points in the direction you want the shade to cast. For instance, if you want shade later in the afternoon then consider fitting one of the low points toward the west. That way you create a lower edge to the sail limiting the amount of sun which can cut in under it and maximising your usable shade.
There’s a simple formula for working out the twist in the sail. Let’s say you want to create a relatively gentle twist in your sail, nothing to dramatic. To do this you work measure the longest side of the sail and then times it by 15%. For example, lets say the longest edge to your shade sail was 6 metres. 15% of 6m = 900mm. If your low points of attachment were 2.2 metres then you’d want the high points of attachment to be 3.1 metres above ground (i.e: 2.2 + .9 = 3.1). If you want to create more dramatic effect, then increase the percentage of variance, say up to 20%.
Hypar shade sails are an industry standard because they work. They give good amounts of usable shade, they look great and they tension up easily. They don’t need to be limited to 4 points of attachment but can be 6, 8 or more. I’d say if your thinking about installing a shade sail then you should be thinking about how a hypar design can work for you.

 Have a look at this shade sail. It’s a problem that we see often. The shadesail is sagging badly in the centre and this particular sail has gotten to the point that it has sagged so badly that the centre is rubbing on the top of the play equipment and this has caused it to wear a hole in middle.


